Getting Perfect Community Photos
By John Hall - July 10, 2018
Last week, we talked about the importance of photography in your community marketing. If you missed that post, you can see it here. Now, let’s take a look at some specific methods and concepts that will make your photography more effective.
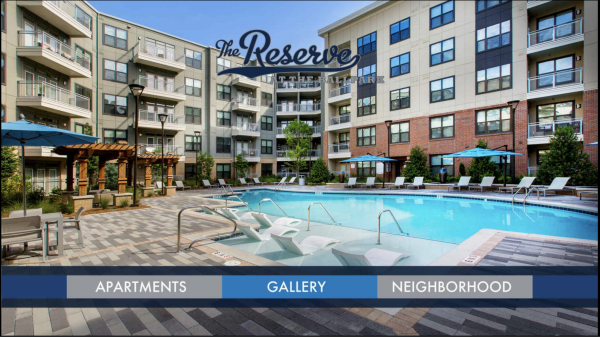
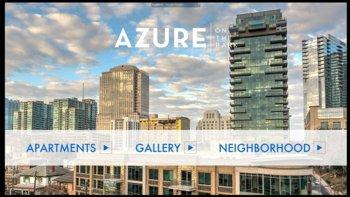
1) For exterior shots, shoot from a distance, and include the surrounding environment. You should have shots from different times of day, and even of different seasons. Early and late day photographs are the best for capturing the proper sunlight. Exterior photography should give an impression of your community’s neighborhood, since that is also an important selling point. There are some good tips for photographing structures here.
2) For interior shots, seek optimal perspectives and lighting. Arrange furniture and camera angles to make rooms look their best. Shadows are always an issue in interior photography. Fortunately, there are a lot of different ways to deal with them. For more details on this kind of photograph, look at real estate photography tutorials, like this one.
3) Take more than you think you need. You can - and should - crop your photos later. Make sure you put a lot into the frame, and give yourself more options of what to keep later!
4) Then, get rid of some. Don’t let enough become too much. We have seen communities want to populate their touchscreen applications with photos of their workout facility from every angle, or with multiple shots of closets and bathrooms. If you are creating your Pynwheel gallery, you want to make sure that all of the images on the page are diverse and interesting. Think like an editor - Start with a lot of photos, and then pare down, so that each is a meaningful chapter of your story.
5) Photoshop! Taking photos is only half the battle. This is where you make them shine. Vertical correction - meaning that all vertical structure lines are vertical in your photos - is essential. Crop the photo sections you don’t want to see. Fix shadows and light with HDR Adjustment.
6) Take lifestyle photos - especially if your community is still under construction. Artist renderings are great, but they should be balanced with photos that appeal to the emotions of prospective residents. Your workout room and other amenities look a lot nicer if there are photos of people enjoying them. Remember - this is a very important difference between apartment photography and real estate sales photography.

7) Or, borrow lifestyle photos - Here is another great thing about lifestyle photos: you don’t even have to take them! There is a lot of great stock photography out there that captures the look and feel that is perfect for your community. Don’t make the mistake of relying exclusively on stock photography, but, if you balance stock photos with actual photos (or renderings) of your community, they are an excellent addition. When you choose stock photography, think of the applicants that you are trying to reach.
8) Start big! Good internet images start with large files. At some point, you are going to need to adjust the size and resolution of your photos for use on various platforms. It is easy to make a large item smaller, but very difficult to go from small to large. For touchscreen purposes, images should be be saved and uploaded as JPEGs.
9) Get creative! Sometimes, an unintended effect will create a stunning image. A little abstraction is great, especially for homepage shots. Take a lot of photos, and play around with effects and filters. You never know what art you will create!
Of course, there is one surefire way to get great photos:
Hire a pro! There are a lot of good photographers out there, and your community photos are important enough to your leasing process to make them an excellent investment.
Still, even if you hire your photography out, don’t make the mistake of not understanding the basics above. Being able to communicate what you want in a photographer’s terms will make for a collaborative process, and will help you get the photos that are looking for.
1) For exterior shots, shoot from a distance, and include the surrounding environment. You should have shots from different times of day, and even of different seasons. Early and late day photographs are the best for capturing the proper sunlight. Exterior photography should give an impression of your community’s neighborhood, since that is also an important selling point. There are some good tips for photographing structures here.
2) For interior shots, seek optimal perspectives and lighting. Arrange furniture and camera angles to make rooms look their best. Shadows are always an issue in interior photography. Fortunately, there are a lot of different ways to deal with them. For more details on this kind of photograph, look at real estate photography tutorials, like this one.
3) Take more than you think you need. You can - and should - crop your photos later. Make sure you put a lot into the frame, and give yourself more options of what to keep later!
4) Then, get rid of some. Don’t let enough become too much. We have seen communities want to populate their touchscreen applications with photos of their workout facility from every angle, or with multiple shots of closets and bathrooms. If you are creating your Pynwheel gallery, you want to make sure that all of the images on the page are diverse and interesting. Think like an editor - Start with a lot of photos, and then pare down, so that each is a meaningful chapter of your story.
5) Photoshop! Taking photos is only half the battle. This is where you make them shine. Vertical correction - meaning that all vertical structure lines are vertical in your photos - is essential. Crop the photo sections you don’t want to see. Fix shadows and light with HDR Adjustment.
6) Take lifestyle photos - especially if your community is still under construction. Artist renderings are great, but they should be balanced with photos that appeal to the emotions of prospective residents. Your workout room and other amenities look a lot nicer if there are photos of people enjoying them. Remember - this is a very important difference between apartment photography and real estate sales photography.
7) Or, borrow lifestyle photos - Here is another great thing about lifestyle photos: you don’t even have to take them! There is a lot of great stock photography out there that captures the look and feel that is perfect for your community. Don’t make the mistake of relying exclusively on stock photography, but, if you balance stock photos with actual photos (or renderings) of your community, they are an excellent addition. When you choose stock photography, think of the applicants that you are trying to reach.
8) Start big! Good internet images start with large files. At some point, you are going to need to adjust the size and resolution of your photos for use on various platforms. It is easy to make a large item smaller, but very difficult to go from small to large. For touchscreen purposes, images should be be saved and uploaded as JPEGs.
9) Get creative! Sometimes, an unintended effect will create a stunning image. A little abstraction is great, especially for homepage shots. Take a lot of photos, and play around with effects and filters. You never know what art you will create!
Of course, there is one surefire way to get great photos:
Hire a pro! There are a lot of good photographers out there, and your community photos are important enough to your leasing process to make them an excellent investment.
Still, even if you hire your photography out, don’t make the mistake of not understanding the basics above. Being able to communicate what you want in a photographer’s terms will make for a collaborative process, and will help you get the photos that are looking for.